

~RESTORATION~
RE-LEAD, REPAIR, RESTORE YOUR ANTIQUE TIFFANY & CHURCH STAINED GLASS WINDOWS
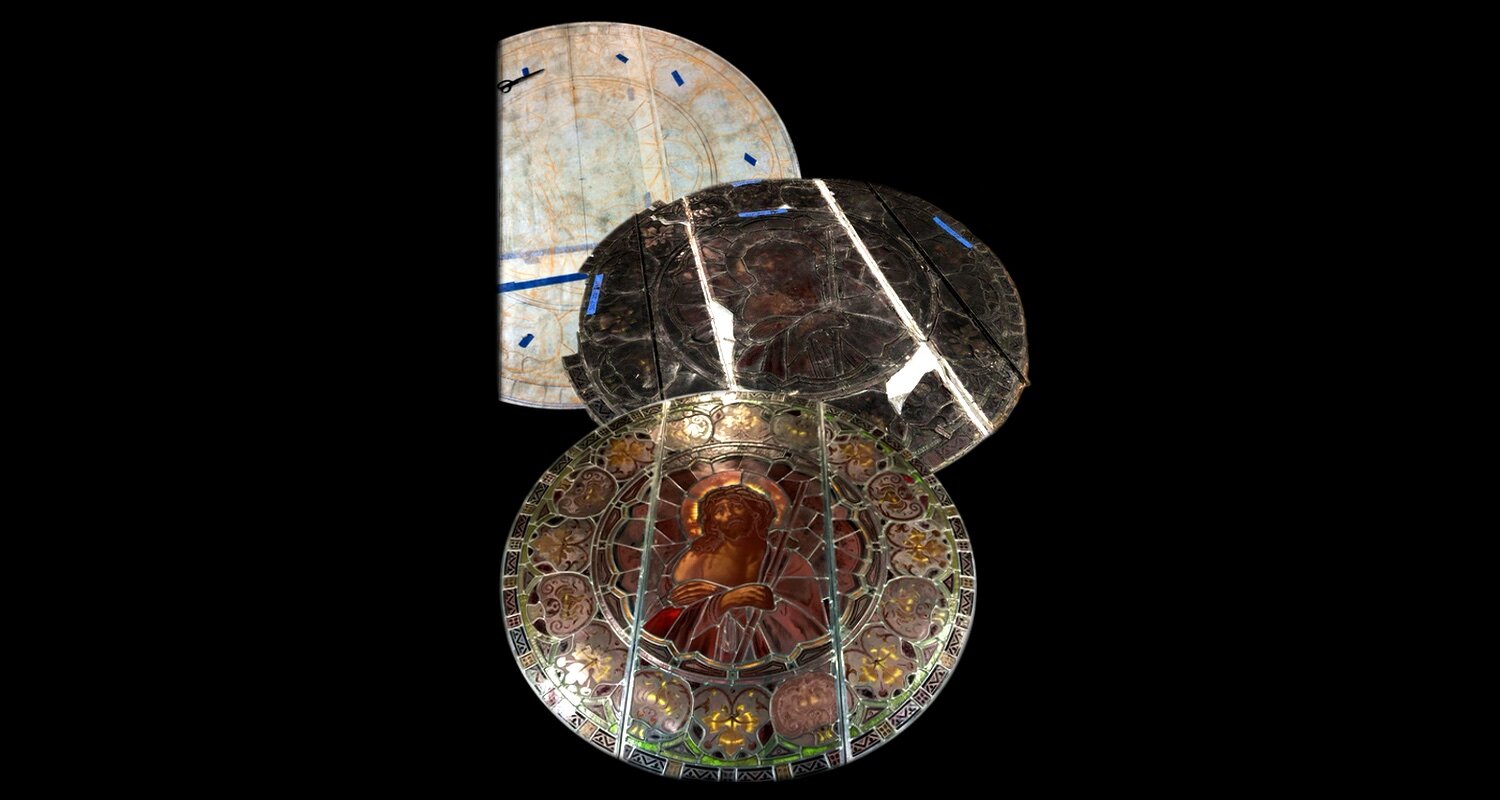
Given time, all stained glass windows will have their leading fail or will incur unforeseen damage. When that happens, entrust the preservation and restoration of your historic, sacred, 100+ year old windows to a professional Studio that has been around for almost as long as your windows themselves. We have given new life to windows ranging from single $750,000 collectable Louis Comfort Tiffany windows for renown museums… all the way to full sets of 30+ Franz Mayer windows for massive cathedrals, churches, chapels, and private estates.


~Q & A~
Q: "What to do if my antique window needs repairing or re-leading?"
A: Our step-by-step guide below will cover the basics of stained glass window repair, however for more extensive or large-scale repairs feel free to email us to discuss further.
Q: “How do I perform a stained glass repair?”
A: We here at JDT Studio are more concerned about the preservation of historic stained glass windows than we are about making money — to the point where we lose business by telling our clients how to repair their own stained glass. However, we are definitely willing to put our tens-of-thousands of accumulated stained glass repair hours to work if you would prefer that our company repairs your window, or set of windows, for you. Otherwise to DIY, read on to learn the basics of both “false-leading” and “glass-panel-replacement”.
Q: “Can I get further assistance?”
A: As with any delicate art-related project, it takes trial and error to become good at that particular craft. Trial and error can be great teachers, but the problem in this case is that those errors can be costly. With a poor false-leading or glass-panel-replacement job you could potentially devalue your stained glass window by hundreds to thousands of dollars. Whether you have 1 window or 100… and are simply looking for further instruction on repair or would like to discuss using JDT Studio's stained glass repair and restoration services, please don’t hesitate to email us! We would love to help in any way that we can.
~FALSE-LEADING TUTORIAL (step-by-step)~
Step 0:
ASSESS the situation
Even before “Step 1” the essential first step to stained glass repair is to determine whether or not the broken piece in question should be false-leaded or replaced entirely. False-leading is the act of severing a piece of lead came in half and placing it over a cracked piece of glass in an attempt to disguise it amongst all of the other lead lines in the window. Glass-panel-replacement, on the other hand, is just like it sounds: replacing a broken panel of glass with a new or identical panel. The choice really comes down to personal preference, as both methods can hurt the value of the window if done incorrectly; false-leading across a face or hand, for example, will noticeably stand out, though it keeps the entire window authentic with the original antique glass panels. In contrast, having an identical, reproduction face or hand created can be more visually appealing, you will lose the authenticity of the antique stained glass window. As a rule of thumb, if there are 3+ cracks in a single glass panel [also known as a “spider-web crack” or a “shatter”] the entire panel should be replaced. You can usually get away with false-leading 1 to 2 cracks without drawing too much suspicion.
Step 1:
PREPARE the lead came
Creating a false-lead, also known as a “flange” or “dutchman”, is a fairly simple process when equipped with the right tools. Measure and cut a piece of lead came that has the same width as the other lead throughout the rest of the stained glass window. When cutting the came, make sure that you start out with a piece that is about an inch or two longer than the actual crack — you can always cut more off later. Using a small lead snips, cut into one of the ends as if you were trying to cut the entire thing in half into two long strips. Take two pliers or vice grips and attach them to both sides of the newly-made cut. Separate the lead came into two strips by pulling in opposite directions. You will end up with one strip of lead came that is smooth and flat and a second strip that is ridged and unusable for the intended purpose.
Step 2:
MOUNT the lead came
Place the smooth, flat piece of lead over the crack, bending it to shape if the crack is not perfectly straight, and then cut it down to size. Once the lead strip is the exact size and shape of the covered crack, tape it down to the window using blue painters tape. Using a Dremel with an abrasion attachment or simply using an abrasive brush, clean the ends of the strip as well as the lead that it will be adhering to.
Step 3:
SOLDER the lead came
Apply a generous amount of lead flux to the recently-cleaned ends of the crack-covering lead strip. Using a soldering iron and a spool of 60/40 solder, press the solder onto the tip of the soldering iron right above the area you would like the solder to adhere to. Once a bead or two has formed you will be able to flatten it out by gently pressing the flat side of the hot tip onto the bead.
Step 4:
ANTIQUE the lead came
Apply a generous amount of lead flux to the recently-cleaned ends of the crack-covering lead strip. Using a soldering iron and a spool of 60/40 solder, press the solder onto the tip of the soldering iron right above the area you would like the solder to adhere to. Once a bead or two has formed you will be able to flatten it out by gently pressing the flat side of the hot tip onto the bead.
~REPLACEMENT TUTORIAL (step-by-step)~
Step 0:
ASSESS the situation
Even before “Step 1” the essential first step to stained glass repair is to determine whether or not the broken piece in question should be false-leaded or replaced entirely. False-leading is the act of severing a piece of lead came in half and placing it over a cracked piece of glass in an attempt to disguise it amongst all of the other lead lines in the window. Glass-panel-replacement, on the other hand, is just like it sounds: replacing a broken panel of glass with a new or identical panel. The choice really comes down to personal preference, as both methods can hurt the value of the window if done incorrectly; false-leading across a face or hand, for example, will noticeably stand out, though it keeps the entire window authentic with the original antique glass panels. In contrast, having an identical, reproduction face or hand created can be more visually appealing, you will lose the authenticity of the antique stained glass window. As a rule of thumb, if there are 3+ cracks in a single glass panel [also known as a “spider-web crack” or a “shatter”] the entire panel should be replaced. You can usually get away with false-leading 1 to 2 cracks without drawing too much suspicion.
Step 1:
REMOVE old panel
Before you do anything, immediately cover the crack or shatter with clear tape in order to retain the glass piece’s shape for later tracing or recreation. Begin by flipping the window panel over to the backside that typically is not visible. Using a thin, flat tool, such as a sharp chisel, wedge the tool between the glass and the lead came and begin to slowly pry upwards in a clockwise manner. Continue to pry the lead up a little at a time while going around the perimeter of the broken glass piece until all of the lead is sticking up and the glass piece can be removed easily. You may need to put the tool perpendicular with the glass and lightly tap against it with a hammer as to flatten the lead out and create a wide birth for the broken glass piece to come out.
Step 2:
RETRACE panel…
If it is a matter of simply recreating a plain, colored piece of glass, you can find sheets of replacement glass at a local hobby or glass store. In this case, put the broken piece of glass on top of the replacement glass sheet and trace the outside edges with a sharpie. Using a well-oiled glass cutter begin to make cuts and breaking the excess off as you go. The edges may not end up very smooth but a few runs on a diamond-bit glass grinder can take care of that problem in no time.
Step 2:
...or RECREATE old panel
This option can run a hefty price but may be the only option if the piece in question is a cracked or shattered painted face, hand, foot, animal, garment, text, icon, etc. Remove the piece as described in “Step 1” and take the broken painted piece to a local stained glass studio to be replicated. Though the glass may not be original, some studios still have the capability to create a near-exact replica to the original. Once the new piece has been painted and fired in the kiln, it will be ready for installation.
Step 3:
INSTALL new panel
Regardless of which “Step 2” you chose, the process of installing the new panel of glass will be quite the same. Slowly lower the new glass panel into the exposed, empty lead space where the broken piece was taken from. Using just your fingers, press the lead back down towards the glass. If necessary, use extremely light taps with a ball-peen hammer to mold the lead back into place. Apply liquid patina [“black”] to the affected lead area and wipe off clean.
C L I C K A S E R V I C E :


C L I C K A P R O J E C T :

ANTIQUE TIFFANY CHURCH STAINED GLASS WINDOWS & ARCHITECTURAL ITEMS
PRESERVE HISTORY WITH JDT STUDIO BY BUYING, SELLING & RESTORING ON THE LARGEST, MOST TRUSTED, ANTIQUE STAINED GLASS & ARCHITECTURAL WEBSITE
